
Recently I announced that National Instruments has released a set of example labs designed to show you how you can get the full use of your Analog Discovery 2. If you have since forgotten and want to review the summaries and mission of the seven labs, you can check out the original post here.
Over the next few weeks I’ll be covering each lab, the tools it uses, and concepts that can help you teach your students. In my previous post I went over Lab 4: Full Wave Rectifiers. In this post I’ll be going over Lab 5: Amplitude Modulation and Demodulation.

Lab 5: Modulation and Demodulation is designed to give students an introduction to communication theory. Students will investigate classical amplitude modulation theory in both the time and frequency domains, learn about the basic properties of fast Fourier transforms (FFT), and see how modulation index affects AM signals in time and frequency domains.
This lab utilizes 2 sets of software, WaveForms 2015 and LabVIEW.
LabVIEW is a development environment design specifically to accelerate the productivity of engineers and scientists. It features a graphical programming syntax that makes it simple to visualize, create, and code engineering systems.
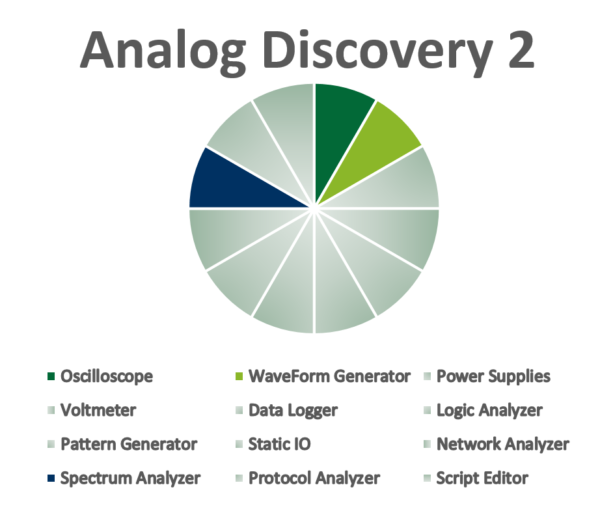
Waveforms 2015 is the software that drives the Analog Discovery 2. For this lab, students will use the waveform generator to send an AM signal, and the oscilloscope to view and analyze the results in the time domain. Then they will use the spectrum analyzer to view the frequency components of the signals and the FFT.
For this lab students would need:
- An Analog Discovery 2
- Jumper Wires
- WaveForms 2015 (A Quick and Free Download)
- LabVIEW 2015 or Later (available from studica)
- Digilent WaveForms VIs (A Free Download)
Similar to Lab 4, Lab 5 goes through theory, simulation, and practical analysis.
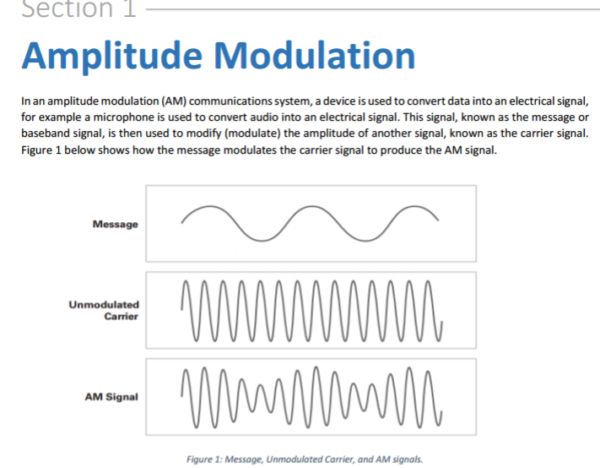
The lab starts by going through the theory of amplitude modulation, what it’s used for, and the component signals.
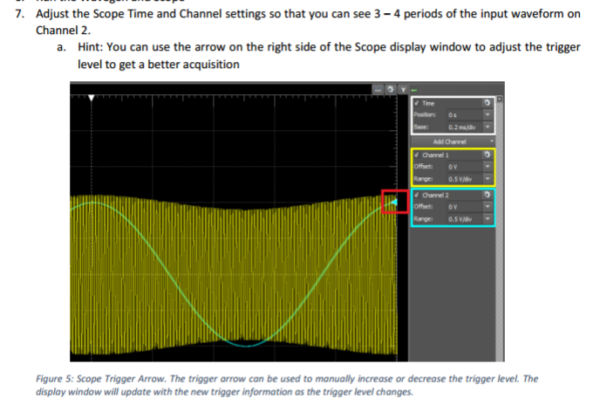
Next, students will connect the waveform generator to the oscilloscope of the Analog Discovery 2, so that they can experiment with AM signals.
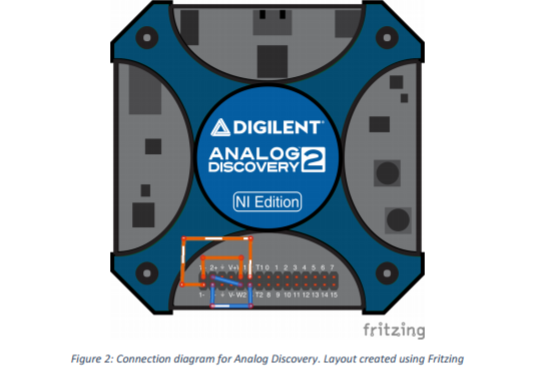
They can use the scope to see the AM signal and see how the carrier and signal frequencies interact.
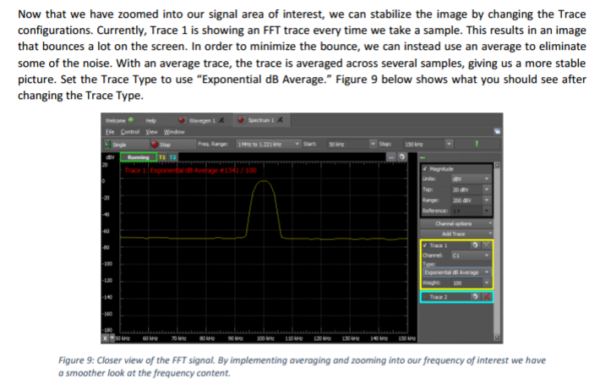
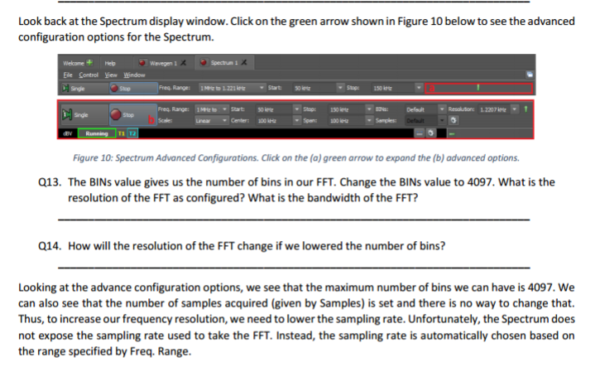
After analyzing the AM signal in the time domain, students will use the spectrum analyzer to view the component signals in the frequency domain.
Along with visual analysis, students will be asked to change the variables that create the input signal and analyze the impact on the AM signal.

Once students gain a full understanding of AM modulation, they can move on to AM demodulation.
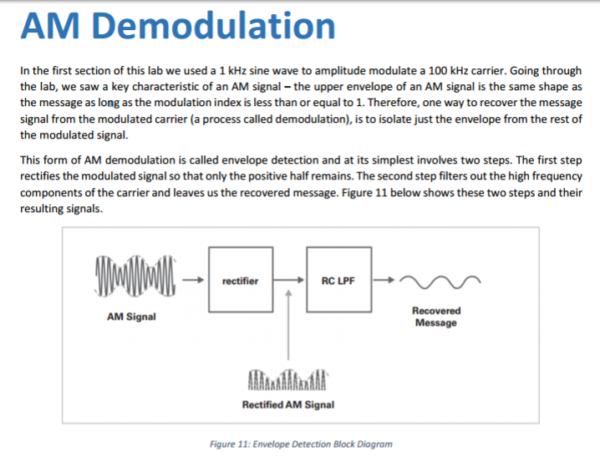
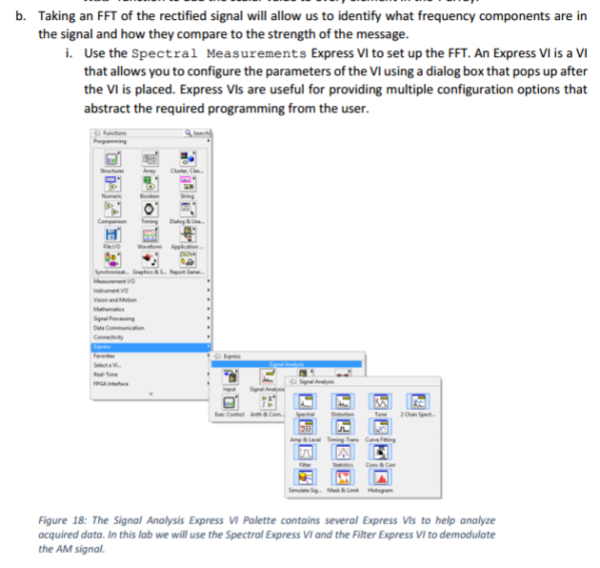
In LabVIEW they can create each of the blocks required for AM demodulation graphically. They’ll start with a given VI to focus on the envelop detection and analyze the data.

The lab will take them through each of the steps to set up demodulation.
Finally, the lab will ask them to analyze the demodulated signal to fully understand the circuits involved.
Stay tuned to the blog next week for Lab 6, or download and checkout the labs yourself. If you are interested in the tools that the Analog Discovery 2 has to offer, more information can be found on its Wiki Page.