
With new products come new project adventures! I naturally gravitate towards experimenting with sounds and audio signals so I wanted to see what the Analog Discovery Studio could do for me given the beefed up power supplies and Breadboard Canvas.
Academic discounts available!
I had a mixer circuit I needed to design for a school project and decided to build it using the Analog Discovery Studio. This circuit needed to use a potentiometer to vary the blend ratio between two input audio signals. I got the idea from my analog design class textbook using a mash-up of an audio pan-pot circuit and a summing amplifier. The audio pan-pot circuit basically split one input signal to two outputs with the split ratio controlled by a potentiometer. I essentially reversed this application such that two input signals would be summed together with a varying ratio based on the potentiometer. After a little simulation time, I confirmed resistor and capacitor values and topology that would perform the analog signal mixing.
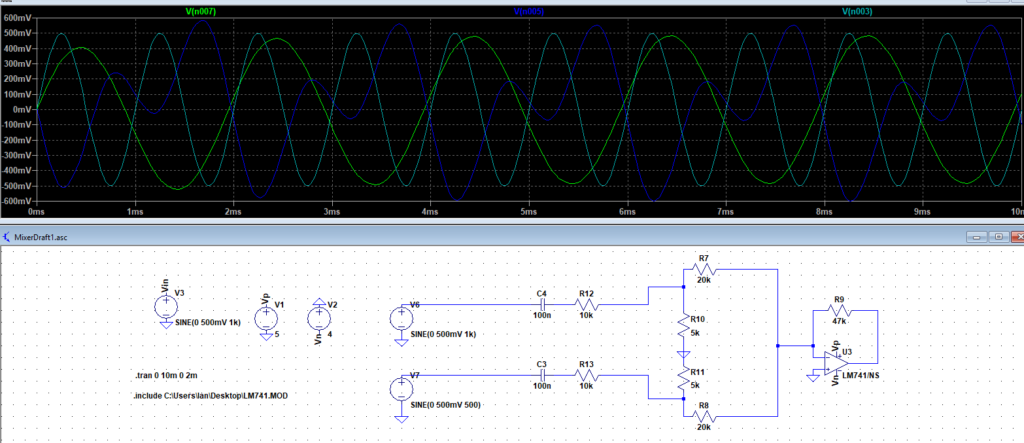
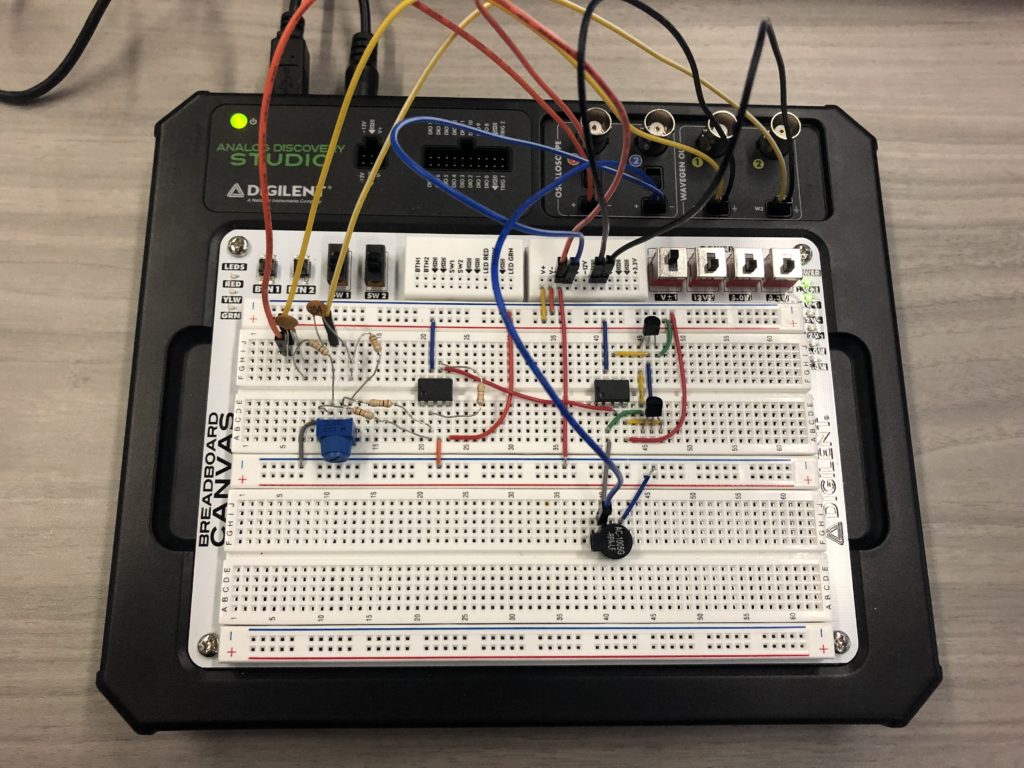
I constructed the mixer circuit first using +5/-4V power supplies (as that is what my design power supply specs were) to an op-amp (I used a 741 but note that this is not a high-fidelity op-amp) and fed in a 500Hz signal to one input and a 1kHz signal to the other input. Using WaveForms, I thought it was super cool to see the two signals blend into each other!

The blue thing is a vertically mounted potentiometer.
Like clockwork, I now wanted to hear my circuit. I threw a speaker on the output and was disappointed to see the beautiful mixing waveform get squashed and distorted. Furthermore, I could barely hear the signals that were coming out. I cranked up the input voltage to about 1V (I was using 500mV and under), the power supply voltages up to +/-12V (thanks Analog Discovery Studio) and still was disappointed to see a super squished mixing signal and quiet sounds from the speaker.
After some thinking and flipping through my book, I remembered that op-amps don’t output enough current to properly drive a low impedance speaker on their own. Using a push-pull amplifier technique, I added another op-amp with BJT transistors in the feedback loop to provide a little more amount of current to drive the speaker. The waveform was still a little distorted at higher input voltages but was performing much more smoothly and the speaker was able to produce a more audible sound. That’s my kind of “noisy circuit”.

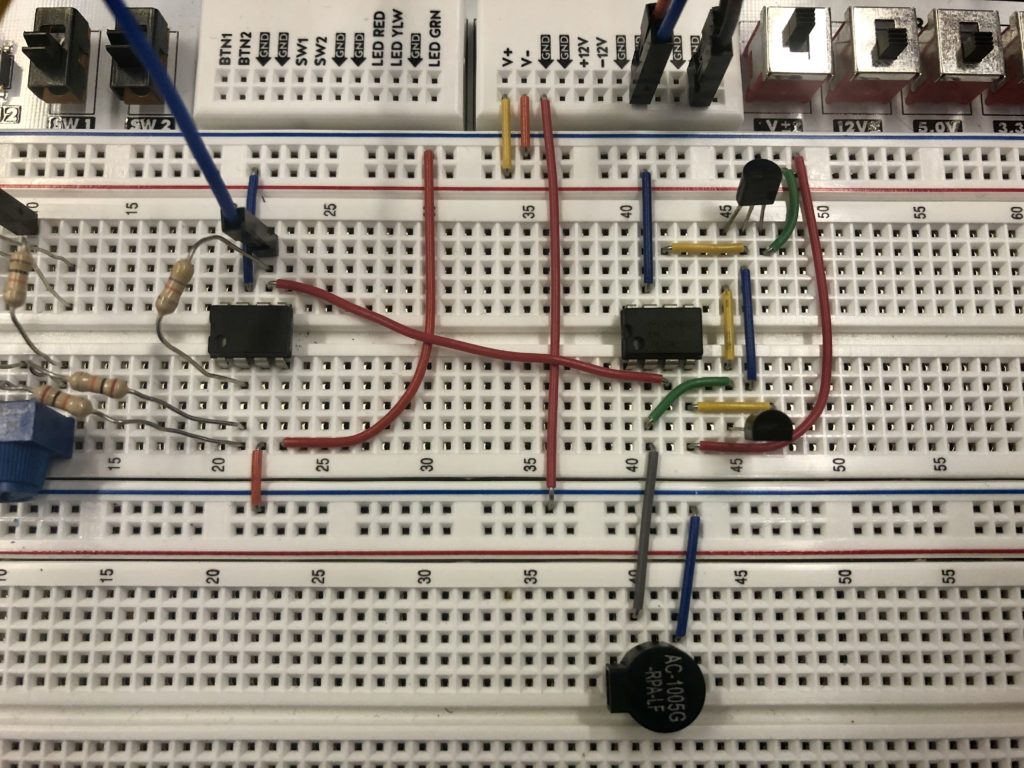
I kept the components spaced out on the Breadboard Canvas because this circuit was set up for a trade show. Since it was being shipped and operated by someone that didn’t build it, I thought this would ease the debugging process if it came up.
All said and done, the Analog Discovery Studio and the accompanying Breadboard Canvas provide more power, flexibility, and portability options for all the hardware people out there. And it works with WaveForms just like the Analog Discovery 2!