
LIRC is a package that allows you to decode and send infra-red signals to many (but not all) commonly used remote controls. LIRC can be used to turn a Raspberry Pi into a universal remote. I used LabVIEW to create a graphical user interface to simplify this process. Below is a tutorial with instructions for using each VI in my LIRC LabVIEW project.
Overview
This guide will walk you through each of the 5 VIs used in my LIRC LabVIEW project.
Tutorial
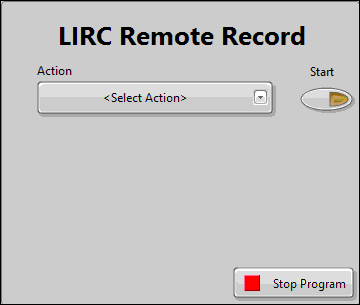
Add VI
- Create New Remote file: Select this action if this is the first remote profile that you have created or if you want to start fresh. This option will overwrite the current remote profile.
- Add New Remote to file: Select this action when you have an existing config file that you want to add to. This option will not overwrite your current remote profile. Instead, it will add a new remote to it.
- Once you select one of these two options, you press start to move to the next step which is the same for each one. Paste the remote profile found in the LIRC index of remotes into the control and press program.
Record VI
- Create New Remote file: Select this action if this is the first remote profile that you have created or if you want to start fresh. This option will overwrite the current remote profile.
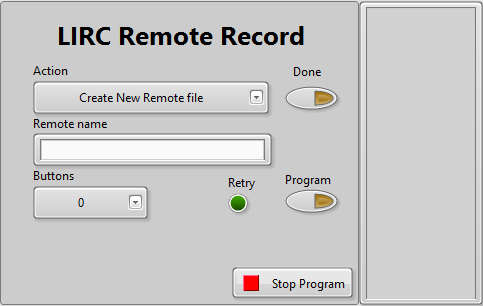
- Remote name Control: Enter the name of the remote you are programming here, this name will be used to identify this remote profile in the future.
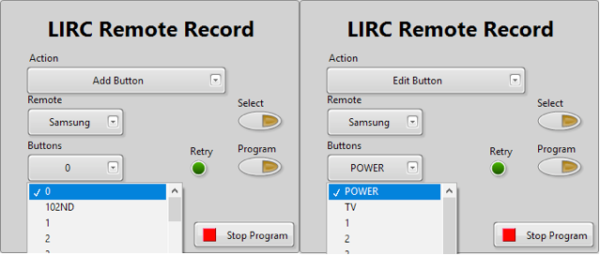
- Program Button: When this button is clicked the Raspberry Pi will begin recording IR values. After you press this button, point your remote at the IR receiver and press the button you wish to program once.
- Retry indicator: This indicator will become true if the recorded IR signal was invalid and you need to try again.
- Remote info indicator: This indicator will show the names of the buttons that you have programmed.
- Done Button: This button will return you to the start menu, press it once you have finished recording all the buttons you want to for this remote. If the “Stop Program” button is pressed instead than the remote profile will not be recorded.
- Add New Remote to file: Select this action when you have an existing config file that you want to add to. This option will not overwrite your current remote profile. Instead, it will add a new remote to it. Otherwise, it is the same as “Create New Remote file” and its user interface is the same.
- Edit Current Remotes: Select this action when you want to modify one of your existing remote profiles
- Delete Remote: This option will allow you to delete one of the remote profiles you have created without having to delete the config file.
- Delete Button: This option will allow you to delete a button from one of the remote profiles you have created.
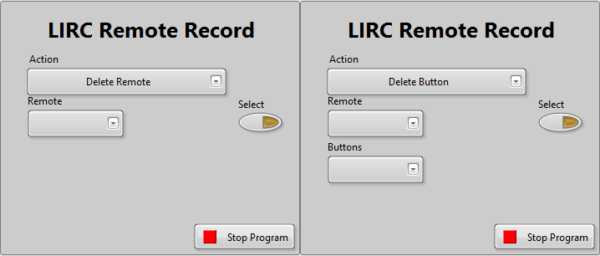
- Edit Button: This option will allow you to edit one of the buttons that you have already programmed.
- Add Button: This option will allow you to add buttons to existing remote profiles.
Remote Replacement VI

- Remote 1: The first drop-down menu is where you will select the remote that you are trying to replace
- Remote 2: The second drop-down menu is where you will select the remote you will use to replace Remote 1
- Option Switch: The switch at the bottom of the front panel can be changed to true if you want all of your programmed remotes to be able to replace this device.
- Start Switch: This button should be pressed when you are done, it will end the VI.
Send VI
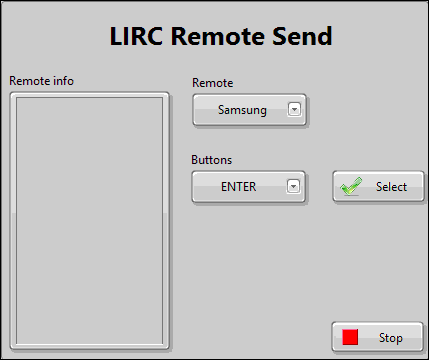
- Remote: In this drop-down menu you select which of the available remotes you would like to use
- Buttons: In this drop-down menu you select one of the buttons available for your chosen remote
- Remote info: This indicator will display the names of a remote will be shown first with its buttons listed beneath it, each button will have a number in front of it.
- Select: Once you have selected the button you would like to send press this button.
Send Application
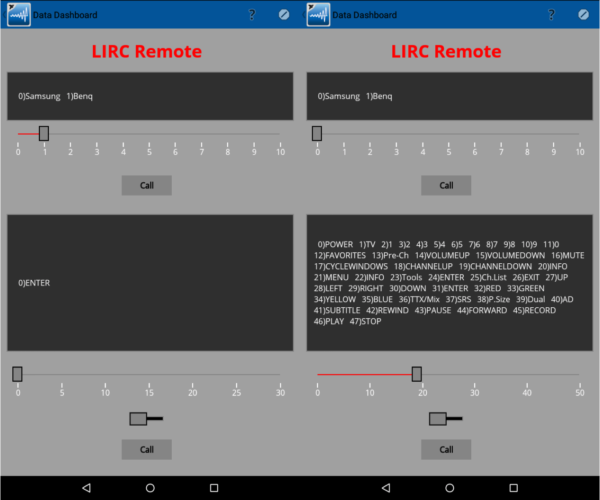
- Remote indicator: Top string indicator, will populate with the names of all of the remotes you have programmed, each remote will have a number before it.
- Remote Slider: Use this slider to select the number corresponding to the remote you want to use.
- Remote Call button: Press this button once you have selected a remote with the slider.
- Button Indicator: Bottom string indicator, will populate with the names of the available buttons for the remote you have chosen.
- Button Slider: Use this slider to select the number corresponding to the button you want to use.
- Toggle switch: To send a button command toggle the switch control and press the call button, make sure you toggle the bottom control each time before you send another command. A new command won’t send unless the switch control has changed since the last command was sent, this is to stop the remote from sending multiple the command multiple times.
- Send Call button: Press this button to send the command for the chosen button.
Thank you for reading my blog post, make sure to check out my Instructable where I give step by step instructions. If you are interested in making a project yourself but don’t have the right supplies, you can purchase the LabVIEW computing kit for the Raspberry Pi 2. This kit includes a copy of LabVIEW 2014 home edition and everything you will need to run LINX 3.0 and start making projects. Please comment with any questions or comments you may have.
Did a double take when I first saw the videos since I was only expecting pictures, but I think it’s a great idea to have them! It’s super useful to see a clear way of how to use this project and gives a clear indication of what you can expect. Love it!