
This installment of the Embedded Linux Adventure has come a bit later than I would have liked. However in the meantime, I have traversed quite a bit of new material regarding embedded Linux development. A significant portion of this time has been dedicated to exploring the PetaLinux tools and design flow needed for building and deploying custom embedded Linux (EL) solutions onto Xilinx hardware. This post will primarily be a short instruction set to get you started with PetaLinux and introduce you to some of the documentation that is available. So let’s start first by addressing the big question: What is PetaLinux?

The short answer is that PetaLinux is a set of software tools that allows for streamlined embedded Linux development. The long answer is that the name PetaLinux actually refers to an individual software package, however it is not a standalone embedded Linux development solution. The workflow for PetaLinux consists of multiple stages in which it relies on other Xilinx software like Vivado and Xilinx SDK.
Browsing the Xilinx documentation for PetaLinux (of which there is a lot, see the links at the end) reveals a few important things. For instance, while Xilinx provides tool for multiple operating systems, the PetaLinux tools are designed for Linux usage only. Specific Linux-supported distros include Red Hat Enterprise (6.6, 6.7, 7.1, 7.2), CentOS (7.1), SUSE (12), and Ubuntu 14.04.
All the typical expectations of required system specifications are mentioned (decent processor ~2GHz, 4GB RAM), however one thing I need to mention is available storage space. You will need a lot. The minimum recommended space is 20GB free, but I used nearly twice that when developing an embedded Linux build for the Zybo my first time around (side note, if your interested in getting started with embedded Linux on the Zybo check out this Instructable to get started)!
As far as storage goes, your experience may be different but just prepare for massive usage. The last thing you want is to be nearly done with your project and run into road blocks due to a lack of storage space.
Now that we have the introduction out of the way, let’s talk about getting started with PetaLinux and embedded Linux development.
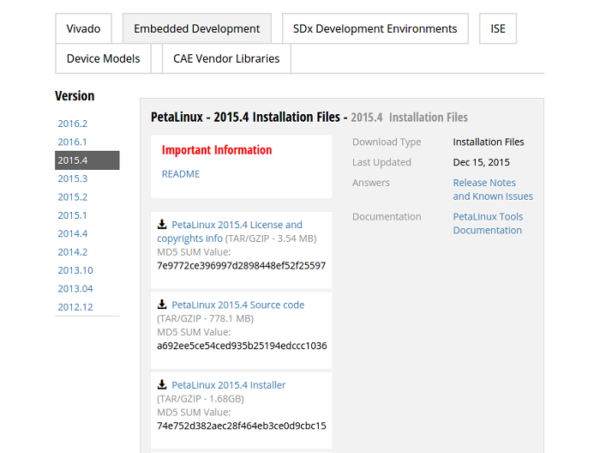
Getting started with PetaLinux is fairly straightforward, though it involves a lot of download and install time. Assuming you already have a version of Vivado and SDK installed (if not, get them here), you will need to download the PetaLinux installer of the same version number. The download is over 5GB (between the installer and the final download), so start it, and then go make a sandwich and watch a couple episodes of a show you like; unless you have a blazing fast connection, it will take a while.
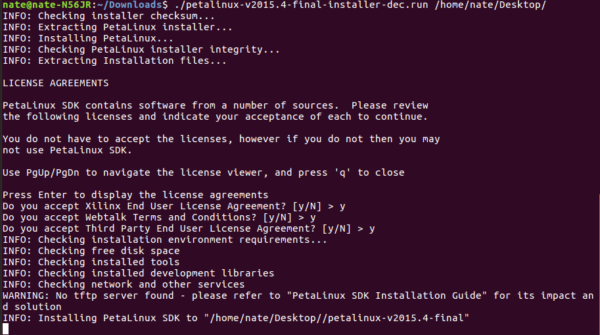
The directory you install it into is not of tremendous consequence. Just cd into the directory the installer is located and run petalinux-v20XX.X-final-installer.run (the Xs are whatever version number you downloaded), indicating the directory you wish to install it into.
PetaLinux uses the same licensing tools as other Xilinx software, so if you already have your other tools licensed then you should not have any issues. If you do, there are additional resources for that. Once the install is complete, you will need to download a few other development libraries, including some 32-bit compatible libraries (even if you already have the 64 bit versions of the same), since some parts of the toolchain are 32-bit executables.
A complete table of all the additional downloads is provided in the PetaLinux Reference Guide (UG1144) on page 10 (also linked at the end of the post). I am leaving the whole thing out since it is quite long, but here is a screenshot of what I installed in line.
![]()
Once all the installs have been completed, you can set up your tools and create a PetaLinux project directory. The required shell for running PetaLinux is ‘Bash.’ If you have it installed but it is not your default terminal, you can run ‘sudo dpkg-reconfigure dash’ and select ‘No’ when asked if you would like to use Dash as your default shell. Subsequently, you will need to source the PetaLinux, and possibly the Vivado tool settings within the terminal environment you are using. You can do this by typing in the two following commands:
source /your/PetaLinux/Install/Path/settings.sh
source /your/Vivado/Install/Path/settings64.sh
Alternatively, you can add the two commands to the .bashrc file, which will run those commands and make the tool settings available to you any time you open a new terminal. The screenshots below show the modifications I made.

Once this is done, change to the directory you want to create your project in and run the command shown in the screenshot below.

For specific options, –type should just be project, –template will depend on the platform you are targeting (i.e. a Microblaze design, a Zynq chip or Zynq UltraScale), and the –-name will be whatever you want to call it.
So, now we have installed PetaLinux and created a directory in which we can develop our embedded Linux project. In the next post I will go over the steps of configuring and building a project from a board support package (BSP), and adding a custom application into your Linux image.
Here are some additional links to PetaLinux support materials!
- PetaLinux Tools Reference Guide
- PetaLinux Tools Workflow Tutorial
- Xilinx PetaLinux Getting Started Wiki
- Zybo Reference page (the board I am using)
The above can be reproduced on the Genesys ZU, Arty Z7, Cora Z7, Eclypse Z7, and Zybo Z7. Check out my full PetaLinux Instructable for more information and getting started tips!
Hi,
where to keep our petalinux license in ubuntu (which folder).after getting license ,where to keep ,i got an error ,unable to create a project using petalinux-create command ,it showing error .please help me.